
A System Admin can add one Custom Column to your Delivered and Archived Returns Report. Throughout this article, we will use Office Location as an example but any data can be entered into the Custom Column as your firm needs.
Common Custom Columns
- Office Location
- E-File Status
- Payment Status
Using the Custom Column
- Open Settings.
- Select General.
- Type the Column Name under Customize Delivered Report.
- This name will appear in the custom column for the Delivered and Archived Reports.
- Enter each Column Value name that you would like to add for the custom column.
- Press the green 'Add' button after entering each value.
- The number count reflects how many returns that value is associated with.
Open a report for Delivered or Archived Returns. You will see the column that you have created. In our example, it is Location.
- Check the box to the left of the return(s) you want to edit the Custom Column for.
- Click Change [Custom Column Name].
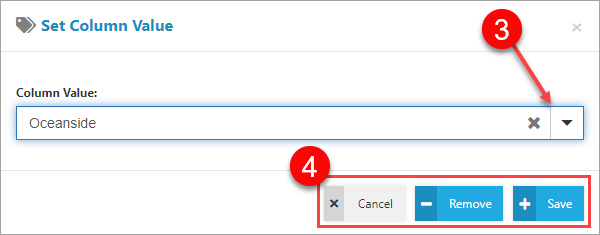
After clicking on Change, you will see a drop-down of all available Values.
- Select an available Column Value.
- Click Save, Remove, or Cancel.
- Save will update the value of the Custom Column.
- Remove will clear out the Custom Column field, leaving it blank.
- Cancel will prevent updates and leave the previous value.
You can set up a default Custom Column value in your Personal Settings to automatically apply to each return that is assigned to you.
- Click your profile menu to open it.
- Click My Settings.
- Select a Value from Default Custom Column Value.
- Click Save & Close.
You can adjust the value of the Custom Column on a return-by-return basis if the User's default does not fit. In the Delivery Options tab, scroll down to find the Custom Column drop-down and select the correct value before delivery.

- Open Settings.
- Click General.
- Select the Delete button next to the Column Name.
- All values must show as 'Unused' to successfully delete the column.
- Follow the steps outlined in the Using the Custom Column section for more information on removing the value from the return.
- Click Yes on the pop-up window and your column will be deleted.
- This will delete all Values associated with the Column Name as well.
Comments
Article is closed for comments.